From The Workbench
A hands-on account of making, experimenting, and learning as we go.
How to Knit a Scarf for Beginners: A Simple, Rewarding First Project
“I want to learn how to knit, but I have no idea where to begin.”
I hear some version of that sentence fairly often in the shop. My answer is almost always the same:
“Let me explain to you simply how to knit a scarf for beginners.”
A scarf is one of the best first knitting projects because it does not need sleeves, buttonholes, careful shaping, or a complicated pattern. It is simply a long rectangle. If you can put stitches on a needle, make the basic knit stitch, and take the finished stitches off again, you can knit one.
That does not mean every stitch will be perfect. Your first rows may be too tight. An edge may wander. You may discover a mysterious hole that you do not remember making.
That is all part of learning.
So pull up a chair at the workbench. We will keep the supplies simple, learn one stitch, and turn that stitch into your first scarf.
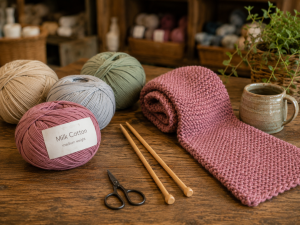
The minimum needed for how to knit for beginners.
What You Need to Knit Your First Scarf
You probably already have a pair of scissors. For this project, you will also need:
- Milk Cotton Yarn in a color you will enjoy seeing for many rows
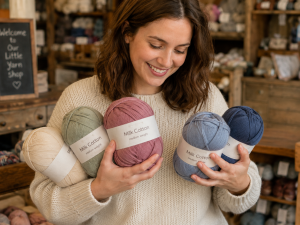
So many choices. How will I ever choose?
- One pair of straight knitting needles between 4 and 6 mm in diameter from the Carbonized Knitting Needle Set
- A yarn or tapestry needle for weaving in the loose ends
- A measuring tape or ruler, if you have one
That is enough to begin.
Choose a color you genuinely like. A first scarf takes time, and it is much more pleasant to watch a favorite color grow across the needles. A lighter or medium shade can also make the individual stitches easier to see than very dark yarn while you are learning.
Before buying the yarn, check how much comes in each ball or skein. The amount required depends on the yarn’s yardage, your needle size, the width and length of the scarf, and how tightly you knit. If you need several balls, buy them together and choose the same dye lot when one is listed so the color remains consistent.
Choosing the Right Knitting-Needle Size
The size of the needle affects the size and character of the stitches.
- A 4 mm needle generally makes smaller, tighter stitches and a denser fabric.
- A 5 mm needle gives you a useful middle ground and is a friendly place to begin.
- A 6 mm needle generally makes larger, looser stitches and a softer, more open fabric.
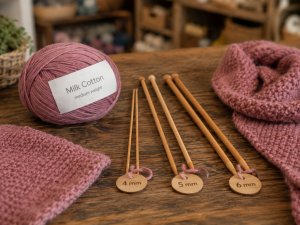
Match the needles to the look you want.
In other words, a larger needle does not give you more stitches across the scarf. It makes each stitch larger, so you will usually need fewer stitches to reach the same width. A smaller needle makes each stitch smaller, so you may need more of them.
The recommended needle size on the yarn label is always the best starting point. The ranges printed on yarn labels and charts are guides, however, because every knitter holds the yarn with slightly different tension.
For this beginner scarf, I would begin with a 5 mm needle if it suits the yarn label. If your stitches feel painfully tight and will barely move along the needle, try a larger size. If the fabric looks much more open and loose than you want, try a smaller size.
The needle makes the loop; your hands only guide the yarn.
Try not to pull every new stitch as tight as possible. Knitting should be controlled, not strangled.
A Few Knitting Words Before We Begin
Knitting has its own vocabulary, but you only need a few terms for this scarf:
- A stitch is one loop of yarn held on the needle.
- A row is one complete trip across all the stitches.
- To cast on means to place the first row of loops on the needle.
- The working yarn is the strand leading back to the ball of yarn.
- The tail is the shorter loose end left at the beginning or end.
- To bind off or cast off means to secure the last row and remove the scarf from the needle.
- Garter stitch is the ridged fabric made by knitting every stitch of every row.
For this scarf, we are using garter stitch. You will not need to learn the purl stitch yet.
The Simple Beginner Scarf Pattern
How to knit a scarf for beginners: Here is the entire pattern before we slow it down and learn each part:
Skill level: First-time beginner
Needles: 4–6 mm straight needles; 5 mm is a useful starting choice when it matches the yarn recommendation
Stitch: Garter stitch—knit every stitch of every row
Starting width: Cast on 24 stitches, then adjust after measuring
Length: Continue until the scarf reaches your preferred length, often about 55–65 inches for an adult scarf
Pattern:
- Cast on 24 stitches.
- Knit every stitch across the first row.
- Turn the work.
- Knit every stitch across the next row.
- Repeat Step 4 until the scarf is as long as you want it.
- Bind off loosely.
- Weave in the yarn ends.
That is the whole scarf. Now let us take it one step at a time.
Step 1: Make a Slip Knot
Pull about 8 inches of yarn from the ball so you have a tail to weave in later.
Make a loop in the yarn. Reach through the loop, catch the working yarn, and pull a new loop through. Place that new loop on one needle and pull gently on the two strands until it sits snugly around the needle.
The loop should slide without falling off. Do not cinch it so tightly that it cannot move.
Your slip knot counts as the first stitch.
Step 2: Cast On 24 Stitches
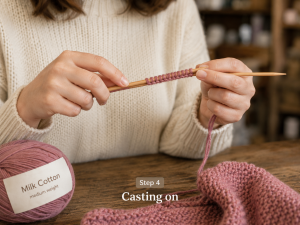
The First Stitches!
There are many ways to cast on. For a first scarf, the knitted cast-on is useful because its motion resembles the knit stitch you are about to learn.
- Hold the needle with the slip knot in your left hand and the empty needle in your right.
- Insert the point of the right needle through the slip-knot loop from front to back so the needles cross.
- Keep the working yarn behind the needles. Wrap it around the point of the right needle.
- Use the right needle to pull that wrapped yarn through the slip knot, creating a new loop.
- Place the new loop onto the left needle without removing the original stitch.
- Insert the right needle into the new loop and repeat until there are 24 stitches on the left needle.
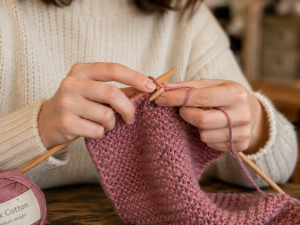
Take it slow at first.
Keep the cast-on loops loose enough to slide. If the first row is difficult to knit, the cast-on is probably too tight.
Why 24 stitches? It gives us a sensible place to start, but it is not a sacred number. Knit about 8 to 10 rows and lay the work flat without stretching it. If it is close to the width you want, often 6 to 8 inches, continue. If it is too narrow, begin again with more stitches. If it is too wide, use fewer.
Yes, that may mean starting over.
No, it does not mean you failed.
You have made a small practice swatch and learned something useful about your yarn, needles, and tension.
Step 3: Make the Knit Stitch
Now we make the stitch that will form the entire scarf.
Hold the needle containing the cast-on stitches in your left hand and the empty needle in your right. Let the working yarn hang behind the needles.
For each stitch:
- Insert the right needle through the front of the first loop on the left needle, moving from front to back. The two needles will cross like an X.
- Wrap the working yarn around the point of the right needle.
- Use the right needle to pull the new loop through the old loop.
- Slide the old loop off the left needle.
One new stitch now rests on the right needle.
Repeat those four movements across the row:
In. Around. Through. Off.
Say it quietly if it helps. Knitting is a repeated movement, and your hands will begin to remember it before you expect them to.
When every stitch has moved from the left needle to the right needle, you have completed one row.
Step 4: Turn the Work and Knit the Next Row
Do not try to knit backward.
Move the full needle into your left hand and place the empty needle in your right. The working yarn should be ready near the end of the left needle.
Now knit across the row exactly as before.
When you knit every stitch on every row, small horizontal ridges begin to appear. That fabric is called garter stitch. It lies fairly flat, looks attractive on both sides, and is forgiving of the slightly uneven tension common in a first project.
Continue turning the work and knitting another row.
That is how a scarf grows: one ordinary row at a time.
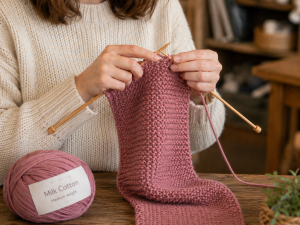
One row at a time keep repeating till done.
Step 5: Count Your Stitches
Count the loops on your needle at the end of every row, especially while you are learning. If you began with 24 stitches, you should still have 24.
If the number keeps increasing, you may be accidentally wrapping the yarn over the needle at the edge or knitting into the same stitch twice. If the number decreases, a stitch may have slipped off or two stitches may have been worked together.
It is much easier to investigate a mistake after one row than after twenty.
Keep an eye on the first and last stitches, but do not pull them excessively tight. Slightly uneven edges are normal on a first scarf. They usually become steadier as your hands settle into a rhythm.
You are doing so well! Keep on going.
Step 6: Keep Knitting Until the Scarf Is Long Enough
A typical adult scarf might be around 55 to 65 inches long, but there is no single correct length. You can make it shorter, longer, or simply stop when it wraps the way you like.
Measure the scarf while it is resting flat and relaxed. Do not stretch it to persuade it that it is finished.
If you reach the end of a ball of yarn, add the next one at the beginning of a row when possible:
- Leave about a 6-inch tail from the old yarn.
- Leave a similar tail from the new yarn.
- Begin knitting with the new strand.
- After several stitches, gently adjust the loose edge stitch if needed.
- Weave both tails into the finished scarf later.
Avoid tying a permanent hard knot in the middle of the fabric. Knots can create uncomfortable bumps and may work loose over time.
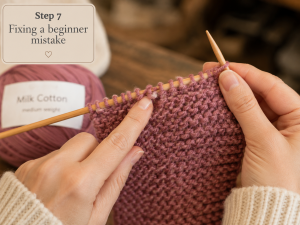
Don’t sweat it. Mistakes happen and are easy to fix.
Common First-Scarf Problems
My stitches are too tight
Relax your grip and avoid yanking the working yarn after each stitch. Keep the stitches near the thicker part of the needle while forming them so the needle—not the narrow tip—sets their size. If the fabric remains extremely tight, try the next larger needle.
My stitches are very loose
Keep the working yarn gently controlled, but do not overcorrect by pulling hard. A smaller needle may create the denser fabric you prefer. Most beginners’ tension becomes more even with practice.
I found a hole
You may have accidentally brought the yarn over the needle, creating an extra loop. Count your stitches. If you now have one more than you started with, that is a likely cause.
A stitch fell off the needle
Stop knitting and place the loose loop on a needle or safety pin before it travels farther down the scarf. A dropped stitch can create a ladder of loose strands. It can be repaired with a crochet hook, but for a first project, asking an experienced knitter for help—or carefully undoing the last row—is often the least frustrating solution.
My scarf is getting wider or narrower
Count the stitches. An accidental added or dropped stitch is usually responsible. If the stitch count is correct, the apparent change may come from uneven tension. Lay the scarf flat and look again before deciding there is a problem.
My first rows look untidy
Most first rows do. Keep going for a few inches before judging them. The scarf often becomes noticeably more even as you relax and develop a rhythm.
Step 7: Bind Off the Last Row
When the scarf is long enough, you need to secure the live stitches so they cannot unravel. This is called binding off.
Bind off gently. A very tight last row will pinch the end of the scarf.
- Knit the first two stitches normally. Two stitches will be on the right needle.
- Insert the left needle into the first stitch you knitted—the one farther from the tip of the right needle.
- Lift that first stitch up, over the second stitch, and completely off the right needle. One stitch remains.
- Knit one more stitch.
- Lift the older stitch over the new stitch and off the needle again.
- Repeat until only one loop remains.
- Cut the yarn, leaving a tail of about 6 inches.
- Pull the cut tail through the final loop and tighten it gently.
The scarf is now off the needles.
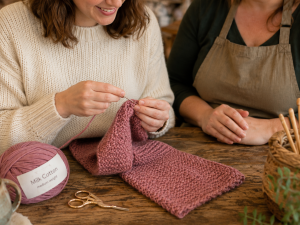
Almost done!
Take a moment to enjoy that. A ball of yarn has become something useful because you kept making one stitch after another.
Step 8: Weave In the Loose Ends
Thread one yarn tail through a yarn or tapestry needle. On the less visible side of the scarf, guide the needle through several nearby stitches, following the path of the knitted yarn rather than pulling straight across the fabric.
Change direction once and weave through a few more stitches. This helps secure the end. Trim the remaining yarn close to the fabric without cutting the scarf itself.
Repeat for every loose tail.
Finally, follow the yarn’s care instructions when washing or gently shaping the scarf. Different fibers behave differently, so the label should make the final decision.
Your First Scarf Does Not Need to Be Perfect Remember This Is How To Knit A Scarf For Beginners
When I teach someone how to knit for the first time, there is usually a moment when they hold up the work and point to an uneven stitch.
“What did I do wrong here?”
Sometimes there is a correctable mistake. More often, I am looking at the ordinary evidence of a person learning how to hold the needles, guide the yarn, and find a comfortable tension.
Your first scarf is not supposed to look as though it came from a machine. The early rows may be uneven. The last rows may be much neater. That visible improvement is part of what makes the scarf worth keeping.
Every ridge records another trip across the needles. Every slightly crooked edge marks a place where your hands were still learning. By the time you bind off, you will know something you did not know when you cast on.
Choose your yarn. Pick up the needles. Make the first loop.
And when the scarf is finished, come back and post a picture. The shopkeeper wants to see it.
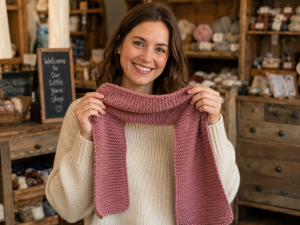
I made this! You can too!
Beginner-Knitting Supplies From This Project
- Milk Cotton Yarn — choose a favorite color for a simple first scarf.
- Carbonized Knitting Needle Set — select a 4–6 mm pair suited to the yarn, with 5 mm as a practical starting point when it matches the label.
- Scissors — for cutting the yarn after binding off or joining a new ball.
- Yarn or tapestry needle — for securely weaving the loose ends into the finished scarf.


0 Comments